

This datasheet describes:
a) how to make peeled tomato preserves, tomato pulp and dried tomatoes.
b) How to preserve tomatoes longer than 3 months (blanching)
c) How to dry tomatoes and how to build a dryer
How to start
With red tomatoes, it is easy to make preserves. With the help of these techniques, we shall prepare jars of peeled tomatoes and tomato pulp and dried tomatoes. With these preserves, we will be able to make red sauces and other preparations all year round, even when there are no more fresh tomatoes on the market.
Picking:
Sunrise is the best time to pick tomatoes. They are still cool from the last hours of the night. Red, really red, these are the right tomatoes for us! They are the richest in vitamins. Very red, ripe but fairly firm with no black spots or blemishes, these tomatoes will make first rate preserves.
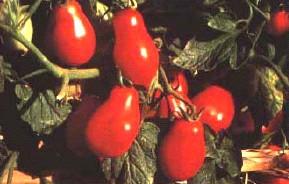 |
| Ripe tomatos on tree |
|
© FAO & INPhO 1998
|
Transport:
To transport these fine fruits, we use basins or crates. But be careful not to put in too many at a time. Did you notice that the boxes are not completely full? So, when we put one on top of the other, the tomatoes underneath will not be squashed. Remember that we can't make good preserves out of damaged tomatoes.
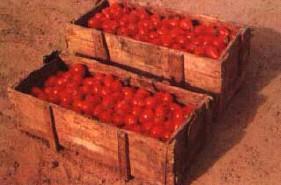 |
| Tomatoes packed in crates |
|
© FAO & INPhO 1998
|
We've got to get our tomatoes quickly to the house. Our team is waiting to start.
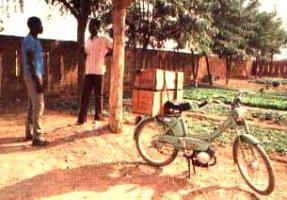 |
| A bicycle ready to transport tomatoes |
|
© FAO & INPhO 1998
|
Hey, we said "quick!" This is not the moment to stop for a chat! You may be in the shade, but your tomatoes are in the sun. They are going to go bad, man! And you can't make good preserves out of tomatoes that have been lying in the sun.
 |
| Loading tomatoes onto bicycle |
|
© FAO & INPhO 1998
|
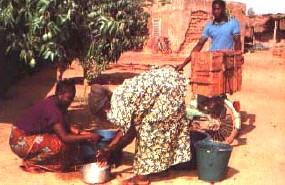
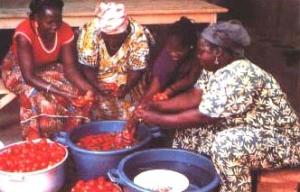
Hygiene:
Let's start by washing our hands, without using scented soap: the scent clinging to the skin will give the tomatoes a bad taste.
Cleaning the tomatoes:
And then let's wash our tomatoes
 |
| Cleaning tomatoes |
|
© FAO & INPhO 1998
|
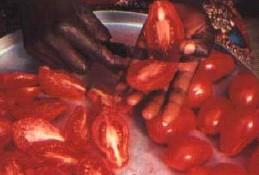
Choosing the tomatoes
Let's take the best ones to make peeled tomato preserves. So that they look nice, we choose tomatoes all more or less the same size. The others will be kept to make pulp or dried. Later on we will see how.
How to make peeled tomato preserves and sterilise jars
To begin with, we are going to explain how to prepare peeled tomato preserves.
Boiling the tomatoes:
Some washed tomatoes (10-15) are put into a bowl. They are dipped gently into boiling water for 30 seconds.
 |
| Gentle dip of tomatoes into boiling water |
|
© FAO & INPhO 1998
|
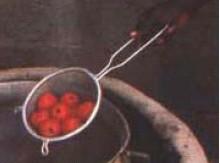
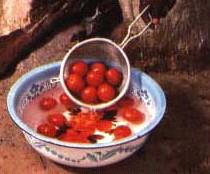
Loosen the skin:
After 30 seconds, they are taken out of the cooking pot as quickly as possible with a sieve. They are plunged immediately into cold water for a few minutes. Immersion in cold water after the boiling water helps to loosen the skin.
 |
| Plunging tomatoes into cold water |
|
© FAO & INPhO 1998
|
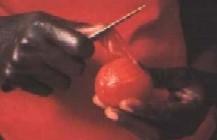
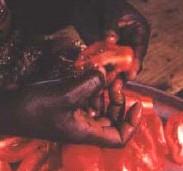
We peel tomatoes completely without leaving any skin on them. Now we want to preserve the peeled tomatoes.
 |
| Peeling tomato |
|
© FAO & INPhO 1998
|
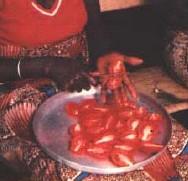
Cleaning the jars:
The jars and the lids must also be clean. Let's wash them with hot water. If they are very dirty, we can rub them clean with sand or small pebbles. But the sand or small pebbles must be clean. Everything is clean, so now the jars can be filled with the peeled tomatoes.
Filling the jars:
The tomatoes are packed in by tapping the bottom of the jar with one hand so the tomatoes are shaken down and fit snugly against each other.
 |
| Tapping the bottom of the jar with one hand to ensure tomatoes fit snugly |
|
© FAO & INPhO 1998
|
Adding lemon juice:
This is the moment to add to each jar a little lemon juice without pips. Watch for the pips! The lemon juice is necessary for preservation. One coffee-spoonful per half-litre jar is enough.
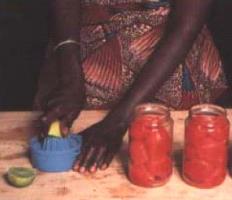 |
| Squeezing lemon to obtain lemon juice |
|
© FAO & INPhO 1998
|
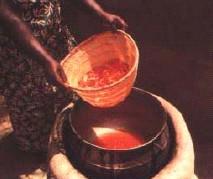
Adding hot pulp:
We also add some hot pulp to fill up the jar. The jar must not be filled right to the top! Leave about 1 centimetre of air underneath the lid.
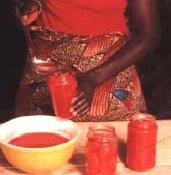 |
| Adding hot tomato pulp to glass jar |
|
© FAO & INPhO 1998
|
Closing the jars:
Be sure to screw the lid on tightly.
Preparations for sterilising the jars:
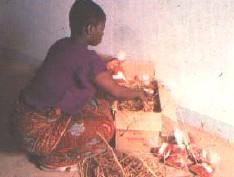
The jars are closed and must now be sterilised. The bottom of a pot is covered with straw. The jars are placed on it, and then more straw put in between the jars to prevent them from knocking against each other. A flat lid and a big stone on top of it will keep the jars steady and in place.
 |
| Sterilizing jars in a pot |
|
© FAO & INPhO 1998
|
Sterilizing the jars:
The pot is filled with water. The top jars must be at least 2 centimetres under the water. Now lit a fire and wait for the water to start boiling. It should boil for 45 minutes. 45 minutes for half-litre jars. There's no point in boiling them any longer. After 45 minutes, the preserves are sterilised. Put out the fire and leave the jars to cool.
Finishing the peeled tomato preserves:
Next morning the jars are rinsed and dried. You can stick a label on every jar with the name of the product, the name of the group or cooperative, date of preparation and the expiry date. Preferably, these jars should be kept in a cool, dark place. These preserves should be consumed within the year. They can be used to make sauces and other preparations when there are no fresh tomatoes on the market.
How to prepare tomato pulp
We are now going to see how to prepare tomato pulp.
Preparations:
Let's take the tomatoes of different shapes and sizes that we put aside just now. You remember they were picked in the morning. They were not squashed during transport, they were not left in the sun and they have been carefully washed. They must also be well drained.
Washing the jars and your hands:
The jars are washed with hot water and sand or small pebbles. Sand or small pebbles must be clean. Wash your hands before cutting the tomatoes. Soap is not necessary and it could leave a bad taste.
Cutting the tomatoes:
The tomatoes are cut in half and checked inside for any that might be rotten.
 |
| Cutting tomatoes |
|
© FAO & INPhO 1998
|
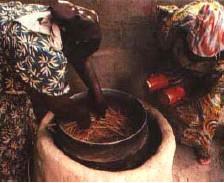
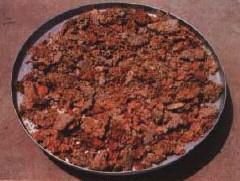
Extracting the pulp:
The opened tomatoes go into a device called an extractor. It extracts the pulp. It separates the pulp from the seeds and the skin. If there is no extractor available, you can also cut the tomatoes into smaller parts. Leave away the seeds and squash them. Put the squashed tomatoes through a sieve and repeat this several times to help crush the pulp and maximise the yield.
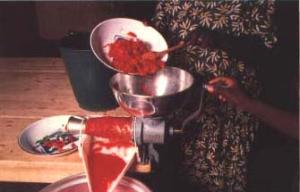 |
| Using an extractor to extract tomato pulp |
|
© FAO & INPhO 1998
|
Pre-heating:
When all the pulp is collected, we pour it into a cooking pot. The pot is placed on the fire for what is called the pre-heating. It must simmer without ever boiling.
Adding lemon juice:
A small spoonful of lemon juice without pips goes into each clean, empty jar.
Closing the jars:
Now fill in the tomato pulp into the jar. The jar must not be filled right to the top! Leave about 1 to 2 fingers wide of air underneath the lid. Otherwise the jars can burst during sterilisation. Be sure to screw the lid on tightly.
Sterilising the jars:
The jars with the pulp are sterilised in a pot, just as with the jars of peeled tomatoes, with straw, a big stone to hold them down, and water which will be boiled for 45 minutes. They can be sterilised at the same time as the other jars if there is enough room in the pot.
Sterilization time:
| Size of container in litres | Temperature of the contents | Sterilisation time |
| 0.33 | 60°C | 40 minutes |
| 0.5 | 60°C | 45 minutes |
| 0.66 | 60°C | 55 minutes |
| 0.75 | 60°C | 1 hour |
| 1 litre | 60°C | 1 hour and 10 minutes |
Keeping the tomato preserves:
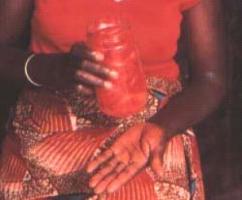
What are you up to? You're dipping your finger in the jar to find out if it's good? Of course it's good! But once the lid has been unscrewed, the tomatoes won't keep long: they must be used the same day. So open the jar only when you are ready to use the peeled tomatoes.
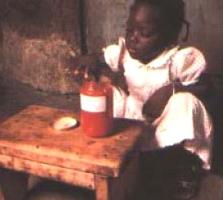 |
| Young girl dipping her finger in the jar to find out if the tomato preserve is good |
|
© FAO & INPhO 1998
|
How to prepare dried tomatoes
We will now see how to prepare dried tomatoes. Whatever their shape, all red tomatoes are good for drying. Prepare only as many as can be dried at one time.
Washing our hands:
Now and every time we handle food, let's not forget to wash our hands first.
Washing and cutting the tomatoes:
We wash the tomatoes, cut them in half, lengthwise.
 |
| Tomatoes cut into halves (lengthwise) |
|
© FAO & INPhO 1998
|
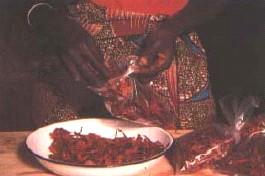
Picking out the pips:
Pick out the pips using our thumbs, without crushing the pulp.
 |
| Picking out pips |
|
© FAO & INPhO 1998
|
Drying the pips in the sun:
These pips are left to dry in the sun. They will provide us with new tomato plants. But note that pips derived from hybrid varieties cannot be used for planting as they will not produce plants like the "mother" plants
 |
| Drying pips in the sun |
|
© FAO & INPhO 1998
|
Cut the tomatoes into slices:
We cut each half-tomato into slices 1 centimetre thick, as evenly as possible. Slices of the same thickness will take the same time to dry.
Just drying these tomatoes means that they can be kept for at least 3 months. But additional processing is necessary if we want to keep them longer.
How to preserve the tomatoes longer than 3 months: blanching and drying
Preparations:
To do that, first add to the water in the pot a soup-spoonful of salt and a soup-spoonful of preservative per litre of water (citric acid powder). This will prevent blackening of the tomatoes during the drying process. Then we boil it, stirring it with a wooden spoon.
"Blanching":
We put the tomato slices in a piece of cloth or in a very clean basket, and plunge into this boiling water for 3 minutes. This is called "blanching". Blanching means boiling of vegetables before drying them to kill the enzymes. So they will not spoil the food during drying. Then we drain them.
The tomato slices are ready to be put in the dryer.
 |
| Tomato slices ready to be placed in dryer |
|
© FAO & INPhO 1998
|
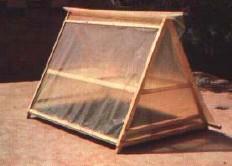
Simple dryers:
There are several types of modern dryers, of varying sizes. They could be made from plastic. Plastic retains the heat of the sun and, secondly, the air circulates inside, coming in at the bottom and going out at the top. The plastic or mosquito netting prevents flies and other insects to spoil the drying tomatoes.
|
|
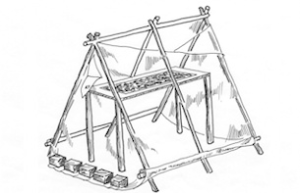 |
| Simple solar dryer. Use of plastic or mosquito netting prevents insects from spoiling the drying tomatoes. | Drawing of a simple solar dryer |
|
© FAO & INPhO 1998
|
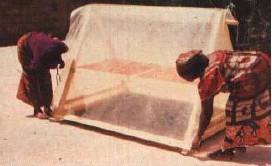
The drawing shows another simple solar dryer.
 |
| Placing tomatoe pieces on a simple solar dryer |
|
© FAO & INPhO 1998
|
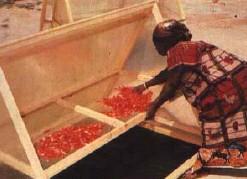
Drying the tomatoes:
Inside the dryers, the tomato slices will be placed on trays made of slatted plastic and mosquito netting. The tomato slices are spread out on the tray as evenly as possible.
 |
| Drying tomatoes |
|
© FAO & INPhO 1998
|
The dryer is shut immediately to protect the tomatoes from dust and flies. A dried basil leaf in the dryer will gives the tomatoes an extra flavour.
Two and a half days later, the tomatoes are dry. They are gathered up and are cooled off for half an hour in a shady place.
 |
| Packing dried tomatoes in polythene bags |
|
© FAO & INPhO 1998
|
They can then be put in polythene bags.
 |
| Packing dried tomatoes in a carton box |
|
© FAO & INPhO 1998
|
The bags of dried tomatoes are kept in cardboard boxes with straw to protect them from damp. In this way they will keep for a year.
Cooking dried tomatoes
When we want to use the dried tomatoes, we soak them in cold water (for a maximum of 2 hours) before preparing a sauce. Use the water that the tomatoes have been soaked in for cooking, because there are nutrients from the tomatoes disolved in this water.
They can also be ground into tomato powder. A soup-spoonful of this powder is enough for a sauce for 6 to 8 people.
Information Source Links
- Food and Agriculture Organization of the United Nations (FAO) and the Information Network on Post-Harvest Operations (INPhO) 1998. See an online filmstrip under www.fao.org