
Short description: There are advantages of picking fresh fruits and vegetables and preserving them. This datasheet contains step by step procedure of making various jams, preserves and marmalades.
Advantages of preserving and picking fresh fruits and vegetables
The advantages of preserving and pickling fresh fruits and vegetables are:
- Possibility to use bumper crops saving them from spoilage
- Advantage of creating a 'shelf life' for the product
- Advantage of increasing the price of the product through value addition
- Ability to reduce the raw product to a higher margin/value less bulk product
- Ability to produce a product that when packaged can travel with less chances of spoilage
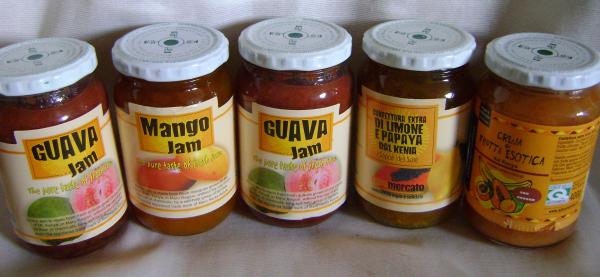 |
| Jams |
| © Su Kahumbu |
Jams
Jams are usually made from fruits and used as bread/toast spreads and dessert sweeteners though some make good savoury condiments too e.g kei apple jelly, cranberry sauce and apple sauce which are used with meat dishes.
Fruit jams are made with fresh fruit that is at it's peak in ripening. If a fruit is too unripe the resulting jam may not have the required colour and may be too acidic requiring extra sugar to act as a sweetener. Adding extra sugar becomes an unnecessary cost when fruit should be able to ripen naturally in the sun.
Making Jam is very simple and generally follows two basic rules
- One, add equal amounts of sugar to fruit pulp
- And two, bring the jam to a boil and then boil very gently for as long as it takes before the 'setting test' proves the jam is ready.
In jam making, the 'setting test' is where a teaspoon of jam is dripped onto a clean glass plate. The jam is then cooled before the plate is then lifted and slanted in an attempt to see what happens to the jam. If the jam slides down the plate it is not ready. If it moves slowly and proves to be slightly jelly like and sticky, it is ready.
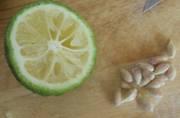
To help a jam reach this 'setting' stage one can add a handful of citrus fruit seeds to the boiling mass in a small cotton or net bag. The pectin from the seeds will help the jam set. After cooking the seeds should be discarded.
Modern jam making receipes often require one to add a commercially available setting agent (normally natural pectin derived from apples). The more pectin one adds the faster a jam should set thus the shorter the 'cooking time' is needed.
Different fruits have different sugar and acidity levels. Generally speaking, those with less acid definitely require pectin to set whereas jams from acidic citrus fruits generally do not. Jams from citrus fruits are referred to a marmalades and can be made inclusive or exclusive of the fruit peels.
Jams can be made from the following fruits: plums, apples, pineapples, guavas, strawberries, raspberries, mulberries, papaya, mango and Marmalades can be made from the following citrus fruits: limes, lemons, oranges, grapefruit
Step by Step Plum Jam
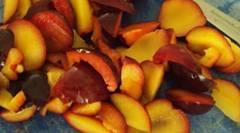
1. Select fresh ripe fruit
 |
| Ripe Fruits |
|
© Su Kahumbu
|
2. Wash and dry the fruit before cutting away the central seeds.
|
|
| Cut Fruits |
|
© Su Kahumbu
|
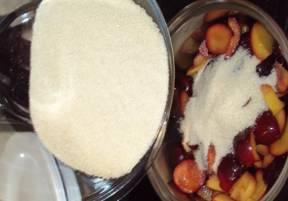 |
| Fruits and Sugar |
|
© Su Kahumbu |
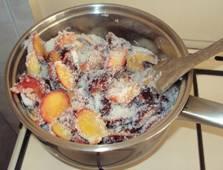
3. Weight the fruit and put them in a heavy cooking pot. Add equal amounts of sugar.
4. Add lemon seeds from one large lemon.
5. Add spices if the recipe calls for it (Cinnamon, cloves etc can add an interesting taste to plum jam).
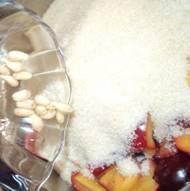 |
| Fruits and Lemon Seeds |
|
© Su Kahumbu |
6. Gently bring the fruit, lemon seed and sugar to boil.
 |
| Boiling Fruits |
| © Su Kahumbu |
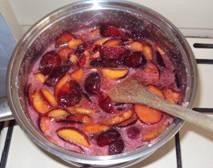 |
7. Gently boil for about an hour stirring continuously for first 15 minutes and then every 10 minutes making sure not to burn the jam by allowing it to sit on the bottom of the pan for prolonged periods of time.
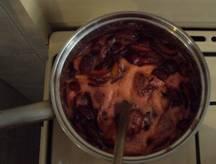 |
You may notice a frothy bubbly film on the surface of the jam, reduce the heat further and remove this film with a spoon. It can be either discarded or eaten on bread or toast. |
| The Froth | |
|
© Su Kahumbu
|
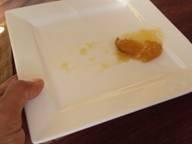
8. Perform the 'setting test' (shown here with orange marmalade). Take a teaspoon of jam from the saucepan and put it on a clean dry saucer or plate. Let the jam cool then hold the plate at an angle and see how far the jam moves. If it is too runny it will fall off the plate and requires further cooking. If it moves very slowly, then it has 'set' and is ready.
 |
| Testing |
| © Su Kahumbu |
 |
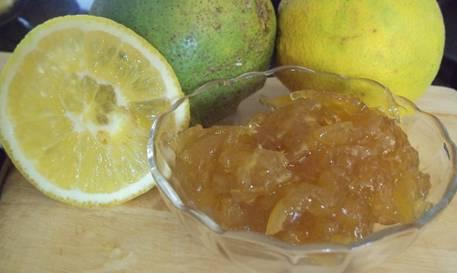
| Ready Marmalade |
| © Su Kahumbu |
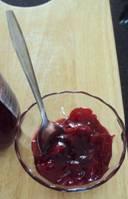 |
| Jam |
| © Su Kahumbu |
Jam that is set, ready for consumption and/or packaging.
9. Sterilise jam jars and lids by boiling in water for 5 minutes and leaving to drip dry.
10. Fill jars whilst jam is still hot. DO NOT burn the jam by allowing it to sit on the bottom of the pan for prolonged periods of time while the heat is still on!
11. Immerse filled jars into boiling water bath for 10 minutes to ensure pasteurization.
12. Carefully remove jars from boiling water and allow to cool before labelling.
13. Store jams in a cool place before transportation to market or other use.
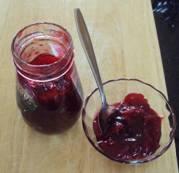 |
| Ready Jam |
| © Su Kahumbu |
The same recipe can be used for most fruit and berries. Berries can also be used to make combination jams and preserves e.g strawberry and raspberry mix
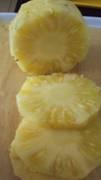 |
| Pineapple Chops |
| © Su Kahumbu |
 |
| Pineapple Cubes |
| © Su Kahumbu |
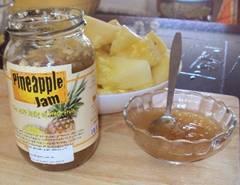 |
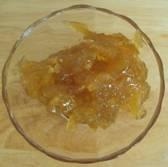
| Pineapple Jam |
| © Su Kahumbu |
Pineapple jam made following same method above as for plum jam.
Marmalades
 |
| Citrus Fruits |
| © Su Kahumbu |
Marmalades are made from citrus fruits and sometimes from combinations of citrus fruits. Marmalades that incorporate the skins of the fruits have a slightly bitter taste due to the citrus oils in the skin. This can be avoided by peeling the fruit.
Step by Step Orange Marmalade
1. Choose good oranges, wash and cut slices and then triangles
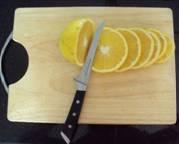 |
| Orange Slices |
| © Su Kahumbu |
 |
| Orange triangles |
| © Su Kahumbu |
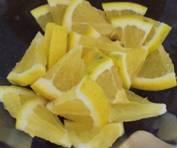 |
| Traingles |
| © Su Kahumbu |
2. Add the seeds from the oranges and seeds from one lemon into a small cotton or net bag.
 |
| Lemon Seeds |
| © Su Kahumbu |
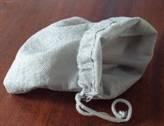 |
| Sac |
| © Su Kahumbu |
3. Add the bag of seeds, cut oranges and equal amount of sugar to weight of orange into a deep heavy saucepan.
4. Bring to boil gently stirring until all the sugar has melted.
5. Stir continuously on a slow boil for about an hour. This will depend on the volume of marmalade you are making. The larger the volume the longer the time.
6. As the marmalade thickens, do the 'setting test' by removing a teaspoon full of the marmalade and testing how it moves when it is cold, on a clean dry saucer or plate.
7. When the marmalade is ready, remove it from the heat and bottle whilst still hot in sterilised jars.
8. When cool, label and store in a cool place until used or taken to market.
TIP!! Adding sugar to jam acts as a preservative as well as a sweetener. You may choose to use less sugar which is fine but keep in mind that unless the product is well pasteurised the shelf life will be reduced and once opened the jam should be consumed before it shows signs of mould growing on the surface. This will of course vary depending on the storage temperatures of opened jams.
Pasteurising Jams and preserves
This is quite a simple process where upon submerging the filled jars in boiling water, any air spaces within the jars will expand releasing the air through the water and causing a vacuum between the lid surface and the product within the jar. Temperatures reached will kill bacteria and result in a sterile environment until the jar is opened.
Step by Step Pasteurisation using water bath method
1. Make sure all jars and lids have been cleaned in hot water to remove any debris from within.
2. Fill jars with contents (jams, preserves etc) whilst they are still hot leaving one centimetre of space between content surface and lid. Filling whilst contents are still hot will minimise the time needed for pasteurisation.
3. Gently submerge the jars into a saucepan or sufuria of hot water and quickly bring it to a gentle boil.
CAUTION !! Try to make sure the jars fit fairly tightly in the saucepan otherwise they will jump about and may easily crack.
4. Remove the jars after 15 mins and leave to cool before storing.
CAUTION !! Be sure not to burn your hands in the hot water or against the hot jars, use a wooden spoon and cloth or jar holding tool to guard against this.